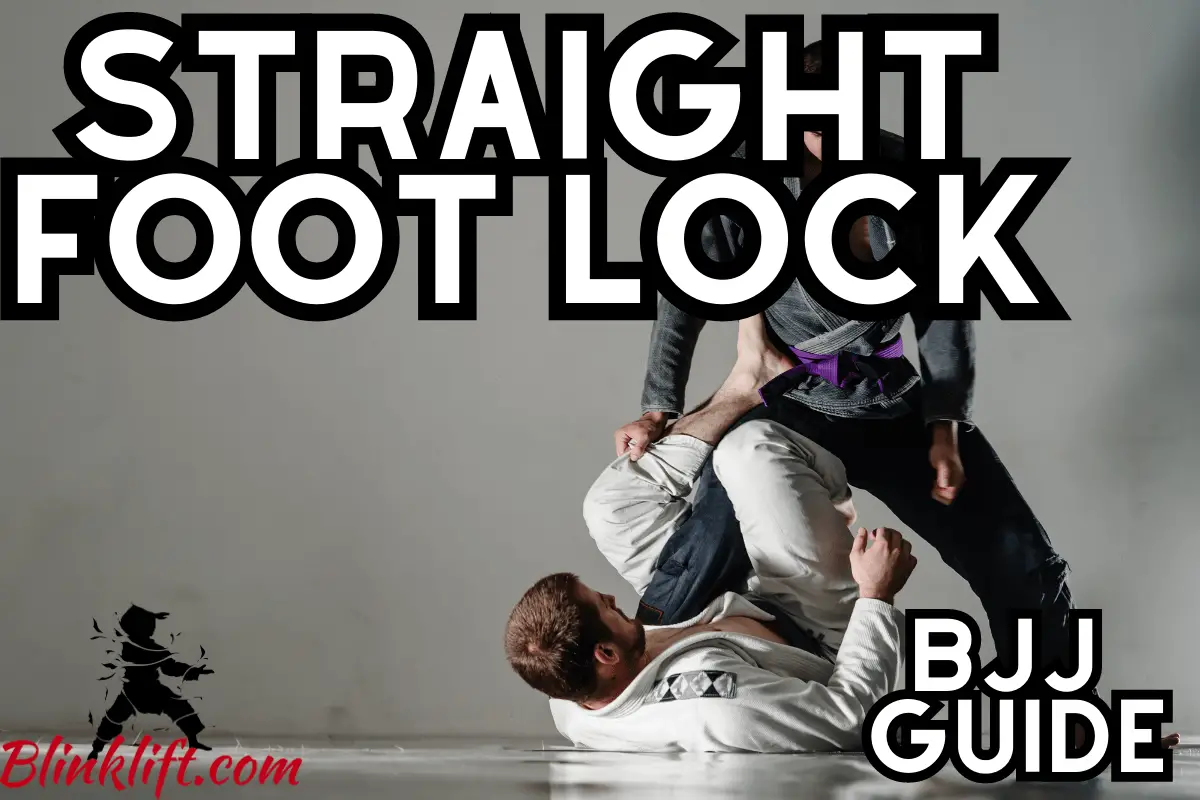
The Straight Foot Lock, also known as the Achilles Lock, is one of BJJ’s most influential and practical leg locks. It’ll allow you to apply extreme amounts of pressure and inflict physical pain on the opponent’s foot and Achilles. That’s why it can be attractive to new grapplers.
However, there’s one more thing you should know about it before we start breaking it down. White belts can use the Straight Foot Lock in competitions. That’s excellent news to all my white belt readers.
You’ll be able to use it in competitions, unlike the Kneebar or the Heel Hook. So you might want to start investing more into it, even though you might still experiment with other leg locks in your classes (if your Professor permits that.)
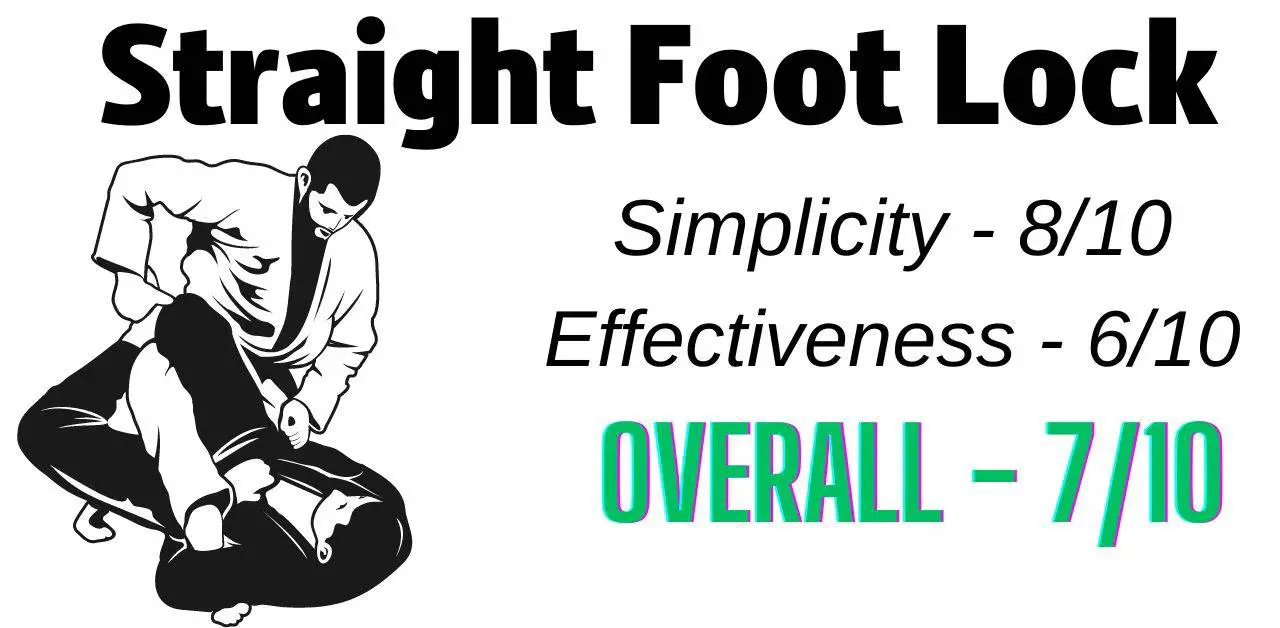
Nonetheless, the Straight Foot Lock is worth learning. It’s worth your time and effort, as it’ll make you a much better grappler.
If you decide to learn it, more options to attack the opponent will reveal themselves to you. For example, you can threaten to attack your partner’s leg when he’s in open or closed guard. Therefore, your partner must be more careful, as you know how to attack the leg fiercely.
This article will showcase numerous variations and break down one later. So stick through if you want to perform the Straight Foot Lock flawlessly. I hope you’re ready for some aggressive learning!
Straight Foot Lock Variations
This part will discuss different variations you want to start playing around with.
The primary rule of thumb here is not to jump into deep waters. Instead, I recommend bookmarking this article and learning these variations individually. You’ll be able to build a solid foundation and muscle memory, making you a more aggressive grappler.
So without further ado, let’s dive into the first variation.
#1 – Straight Foot Lock From Open Guard (Top)
The 1st variation, also the simplest one, is from the open guard position (top.) I’m a fan of this variation because it will be hard to lose if you use it properly. And I’ll explain how to do that right now.
But first, let’s go over the steps to performing this variation flawlessly:
- Start in the open guard (top position)
- Wait for the opponent to reach his leg forward
- Step forward to isolate the other leg
- Grab his ankle (as low as possible)
- Lean back and sit
- Lock your grip (Guillotine or Figure 4)
- Lean on your shoulder (not your elbow)
- Apply pressure by folding the foot
- Apply pressure by extending your back backward
- Wait for the tap
Your aim shouldn’t be to lock the opponent’s leg, although it’s the first step. What should your aim be, then? Your goal will be to pass the opponent’s guard. You’re going to lock the opponent’s leg, and the natural response your partner will go for is pulling his leg back.
From that point, you’ll be able to pass his guard easily using guard passes like the Toreando or Knee Slice. If you want to master guard passes in BJJ, follow this link.
The fact is, the more variations you know, the more threatening you’ll be as a grappler. So let’s dive into the 2nd one!
#2 – Straight Foot Lock From 50/50
The 50/50 is a pre-leg lock submission. If you want to learn more about the 50/50 and other pre-leg lock positions you must know, follow this link.
Anyways, you’ll be able to go for the Straight Foot Lock from this position easily. Your focus must be on controlling the opponent’s legs (both of them.) Although you want to isolate the leg you’re targeting, you also want to pin the other one to ensure your partner can’t move.
Here’s how you perform it:
- Start in the 50/50 position
- Wrap your hand around the opponent’s shin
- Lean to the side
- Push the opponent’s chest with your feet
- Connect your hands
- Lean on your shoulder
- Twist your hips
- Wait for the tap
This variation is powerful; you can apply tons of pressure if you use it. However, there are some nuances you must perfect to ensure you’re capable of finishing it more often and winning more fights using it.
For instance, you want to apply pressure the right way. The last thing you want is to perform everything flawlessly and end up with an opponent that doesn’t tap, as you’re not inflicting enough pressure.
#3 – Straight Foot Lock From North-South
The North-South position gives you plenty of control. And, as you know, BJJ is all about control. The more control you have, the more likely you will win more fights. As a result, we want to utilize positions that give us the upper hand.
Follow this link to learn about the most superior positions in BJJ you must learn to call yourself a grappler.
Here’s how to perform the Straight Foot Lock from the North-South Position:
- Start in North-South
- Put your weight on your toes
- Push his legs down (by grabbing the knee)
- Advance forward (in a swimming motion)
- Grab the opponent’s foot
- Lock your hands (Kimura-grip)
- Apply pressure by folding the foot
- Use your hips for more pressure
- Wait for the tap
This variation is highly effective. Most people are familiar with the Toe Hold variation from the North-South. And indeed, it can be more useful. If you want to learn more about the Toe Hold and how to perform it from many variations, follow this link.
#4 – Straight Foot Lock From Ankle Lock
To perform this last variation, you want to be in an Ankle Lock position before you start the execution. So let’s say you went for another leg lock but couldn’t finish it. Then, the opponent countered your traditional position by stepping forward.
But you still have the Ankle Lock on. You want to bring both your feet and place them on the opponent’s hips. You’ll later utilize this by pushing the opponent to get a lower grip.
The next step is to perfect your grip, so push the opponent using your feet and get a lower grip to finish the Straight Foot Lock. Then, you lock your hands and turn your belly down. The final step is to bring yourself up using the hand on the mat and wait for the tap.
- Start with an Ankle Lock
- Bring your feet and place them on your partner’s hips
- Push the opponent
- Get a lower grip
- Lock your hands
- Turn belly-down
- Apply pressure by lifting yourself up
- Wait for the tap
Alright, fellas, we’ve gone over the 4 variations of the Straight Foot Lock you want to familiarize yourself with. These will help you finish more fights, making you a more dynamic fighter, capable of threatening with more entries.
How to: Straight Foot Lock
This part of the article will break the 1st variations into pieces. It’s the most straightforward variation, so it only makes sense we break it down.
If you have time, I want you to start practicing it in your next BJJ class. You’ll notice how you start winning by using this variation of Straight Foot Lock, as it can be more than effective if you perform it correctly.
So let’s dive in!
Step #1 – Start in open guard
The first step is to start in the open guard position: you being on top. The open guard is one of BJJ’s superior positions. Your opponent can attack you by either sweeping you or going for the closed guard. He has more options, of course.
That’s why you want to be careful.
Although you’re about to attack the leg, you don’t want to be noticeable. The last thing you want happening is the opponent expecting your Straight Foot Lock and going for a counter or not giving you enough room.
Play around with his guard. Try to pass it if you can. That’ll make your move more unexpected.
Step #2 – Wait for the opponent to reach his leg
The 2nd step is to wait for the opponent to reach his leg forward. Your goal is to grab his foot eventually; you don’t want to over-invest and get caught off-guard. But instead, it’ll be better to wait for the opponent to make a move toward you.
Once the opponent reaches his leg forward, you can move to the next step.
Step #3 – Step forward
The next step will be to step forward. This move is an isolation move. Remember, your goal is not only to control the leg you’re targeting but also to control the other leg—to ensure your training partner can’t move, even if he wants to.
Therefore, stepping forward and isolating the other leg is the 3rd step. Indeed, you separate the other leg before grabbing the leg you’re actually targeting. That’s how much you’re going to emphasize control.
More control = Better winning odds.
Step #4 – Grab his ankle
The 4th step will be to grab your opponent’s ankle. This grip is what’s going to serve you later on when you apply the pressure.
Thus, ensuring a firm grip will allow you to control the leg. While it’ll be better not to focus on gripping the most optimized spot, you want to grab as low as you can on the opponent’s ankle.
The lower you go in the 4th step, the less you’ll have to fix in the following steps.
Step #5 – Lean back and sit
The 5th step is to lean back and sit. This is the first step where it gets really obvious you’re going for the Straight Foot Lock. Consequently, you want to ensure you’re acting fast and technically.
You want to find a good balance between speed and technicality. Play around with it, and see which speed still gives the most control over your movements. Being precise, especially in leg locks, is critical. You’ll be less likely to get the tap if you’re all over the place.
Once you lean back and sit down, you want to start working quickly.
Step #6 – Lock your grip
The 6th step is to lock your grip. Now this can be either a Guillotine grip or Figure 4. Both will serve you with the same results. So again, play it to see which one you prefer.
I prefer the Guillotine grip, as it gives me more control to play around and apply more pressure. You want your opponent to tap out quickly, so what gives you more pressure and tightness is your answer.
Step #7 – Lean on your shoulder
The 7th step is to lean on your shoulder. You won’t be able to finish the Straight Foot Lock if you’re leaning on your elbow. You can try to apply a lot of pressure in your current position, and you might even get the tap. But it’s not ideal.
Instead, once you lean on your shoulder, you suddenly have more leverage to play around with. You’ll be able to fold the opponent’s foot and crush the ligaments you’re targeting. That’ll ensure a fast tap out, trust me.
Step #8 – Fold the foot
Now you’re in a position to finish the fight. You want to apply pressure in two directions; the first will be by folding the foot. You do that by leaning on your shoulder and squeezing your grip while turning.
That alone is likely enough to force the opponent to tap out.
However, doing another small detail will allow you to apply pressure in another direction, doubling the amount of pressure and force you generate. If you don’t think that’s powerful right here, I don’t know what is.
Step #9 – Stretch your lower back backward
The 9th step (the final one) is to stretch your lower back backward. This will further stretch your target ligaments and give you more control and pressure.
There’s a 0% chance the opponent will not tap out if you apply pressure correctly while remaining as tight as possible. Therefore, your grip has to be as tight and powerful as possible if you want to force your partner to tap out.
Remember, the more directions you apply force in, the more power and nasty the submission will be. And the faster the opponent will tap out, giving you the win.
Step #10 – Wait for the tap
The final step is to wait for the tap. You must pay attention to the opponent when you perform the Straight Foot Lock or any other submission (especially leg locks.) You can cause some severe damage with this variation (in a harmful way.)
The last thing you want is to hurt your training partner permanently. That ruins the entire points of Jiu-Jitsu and martial arts.
Keeping everyone injury-free is the point of wise training. Getting hurt in training is worse than getting hurt in a fight or a competition.
Thus, remember that it’s just training, and you must release all pressure once the opponent taps out. It’ll also be better to apply pressure slowly and not go all-in to win as quickly as possible. You’re dealing with another human being; please never forget that.
Final Words
The Straight Foot Lock is one of BJJ’s most effective leg locks you must learn. This entire article broke down the specifics of this submission, so you can start mastering it right now.
White belts can also learn and use in competitions, which is fantastic news for all my white belt readers.
Eventually, it’s pretty simple to learn leg lock. You’ll start getting results quickly, so it’s worth learning.
But the Straight Foot Lock isn’t the most effective leg lock BJJ has to offer. Follow this link to learn about BJJ’s best leg locks you must learn to skyrocket your grappling and leg lock skills.
And here are other articles you will like reading if you read thus far into this article: