So you want to learn the Kesa-Gatame position, AKA Scarf Hold. First of all, that’s great—since it’s an extremely useful position in many grappling-based martial arts, such as Judo, BJJ, Catch Wrestling, and even Wrestling.
Second of all, you’ll be able to use it to attack the opponent and get the victory using a submission to your liking. This article will review some of these submissions, so stay tuned for that.
But this article won’t just cover submissions from the Kesa-Gatame position. It’ll also review its fundamentals, setups, attacks, tips, and escapes. All in all, it’ll cover everything you need to know to start using it in your own game.
You’ll be surprised at how correct learning will lead to quick results and a progression rate. I’m confident that this article will be the only resource you need to start getting into the Kesa-Gatame and finishing from it more often.
I have to live up to this expectation now. So, without further ado, let’s dive in!
What is Kesa-Gatame?
The first part of this article will review what the Kesa-Gatame is and why you should consider learning it. Your time is precious, so let me keep this section as concise as possible!
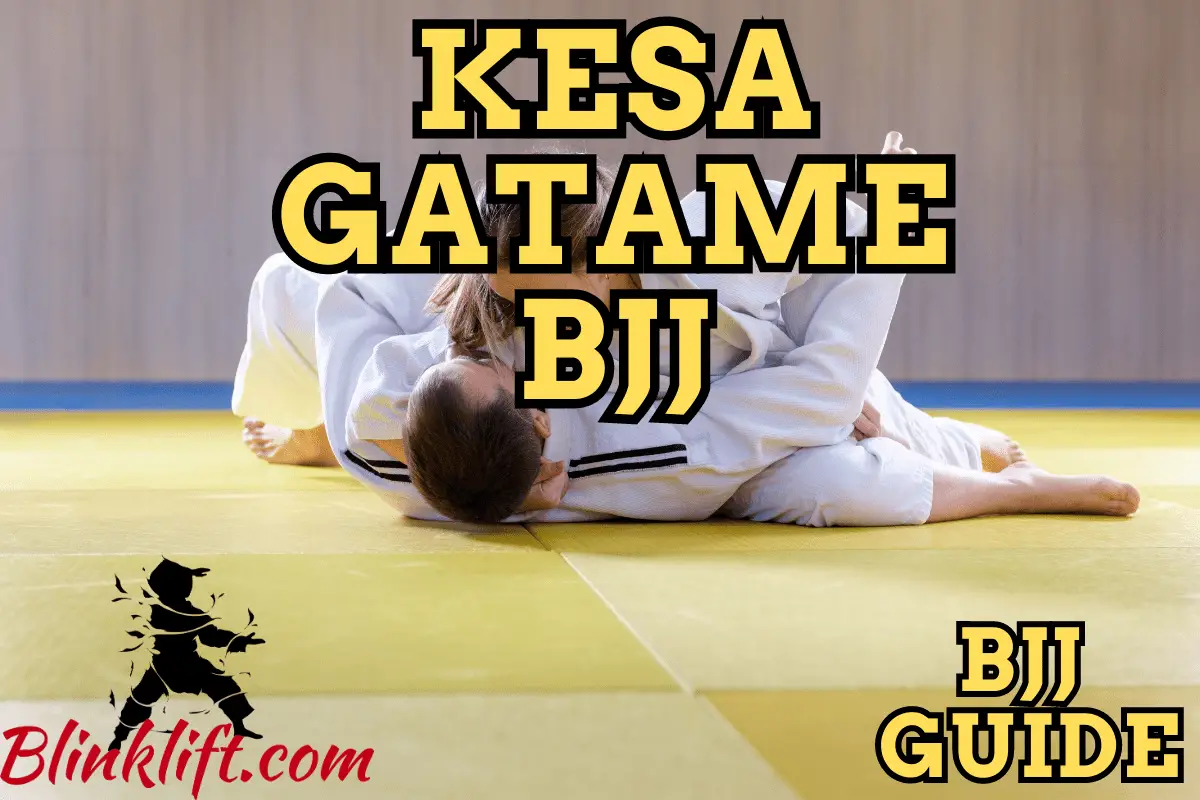
The Kesa-Gatame position, typically taught in BJJ, Judo, and Wrestling, is a variation of the popular Side Control position. It’s when you wrap one of your arms around the opponent’s head and grab his triceps with the other. Finally, you shoot your leg forward, so it’s in line with the opponent’s spine.
Some also refer to it as a type of headlock, as you wrap your arm around your opponent’s head, giving you a lot of control. It is amazing to see just how much control you can get and maintain over your opponent if you know what you’re doing.
For the sake of clarity, let’s assume you’re in Side Control, on the left side. You shoot your right arm around the opponent’s neck, so your forearm is on the back of his head. Then, you want to grab your right hamstring, to ensure the opponent can’t roll.
And finally, you grab the opponent’s right arm with your left hand. The ideal placement is around the elbow, a bit toward the triceps. The last step is to shoot your right leg forward, so it’s in line with the opponent’s spine while basing yourself on the left leg.
How to Perform the Kesa-Gatame
By now, you should be familiar with the very basics of the Kesa-Gatame position. Whether you’re training in Judo, BJJ, wrestling, or any other grappling martial art out there, you want to dive deeper to understand exactly how this position works.
Here are some key points you want to know and implement to perform the Kesa-Gatame.
So first, let’s talk about your body positioning. Typically, you’ll transition into the Scarf Hold from a standard Side Control. We’ll review how you can do that in the upcoming section.
Secondly, you shoot your far hand around the opponent’s head. Eventually, you want your forearm to be on the back of his head (occiput.) So that’s your far hand. Grab your hamstring with the arm that hooks the opponent’s head. This gives you more control and prevents the opponent from bridging.
But about the arm that’s closer to the opponent? You want to grab the opponent’s elbow with this arm. If it’s your left hand you grab with, it’s the opponent’s right arm you’re going to grab. And the opposite applies.
And lastly, let’s review the legs. The first leg, on the same side of the arm that wraps the opponent’s head, should be in line with the opponent’s spine. You want to throw it forward. That will prevent the opponent from rolling, a common escape to the Kesa-Gatame.
Your bottom needs to be off the ground, as that will give you more control. For the last leg, you want to base yourself on it. Think of it as if it’s a kickstand to your body. It’ll keep you in place and prevent the opponent from being able to roll and bridge, which you want to avoid like fire!
That’s it for the more advanced explanation of the Kesa-Gatame.
Kesa-Gatame Setup
We’ll now review the ideal way to attain the Scarf Hold position. Now note that this setup is mostly used in BJJ. This is what Blinklift is mostly about, which is why I decided to mostly focus on it. Here’s how this setup goes:
The best way to transition into the Kesa-Gatame is to start in your typical Side Control position. Then then the opponent underhooks you, which is usually not advantageous for you. Once he underhooks your back, you grab his arm that’s close to you, bring your lead leg in line with his spine, and grab your hamstring.
You’re now in the Scarf Hold position, or Kesa-Gatame!
This is a fairly simple way of attaining this dominant position. Before we begin reviewing submissions, I think it’ll be best if you understand something about this position.
You can get so much control over your opponent if you successfully attain it. It’s also likely that your opponents won’t expect you to get it, as it’s not as common in BJJ. But the amount of control you’ll get—gives you the ability to use an endless set of submissions, making this position invaluable.
We’ll now review three fantastic submissions you want to learn and understand to amp up your Kesa-Gatame game. I hope you’re ready!
Kesa-Gatame Submissions
Alright. We’re now in what, for most people, will be the most enjoyable part of this article. Let’s face it, we all want to know how to finish fights. We’re learning all these different, weird positions—and so we also want to know how to use them once we attain them.
These are submissions, or ways to manipulate the opponent to force him to tap. So without further ado, here’s the first one!
#1 – Americana
The first submission we’ll discuss is the Americana. This is one of these moves you’ll learn in your first few weeks of training. And honestly, this is one of the easiest variations you can start with.
The Americana is all about manipulating and hyperextending the opponent’s arm to force him to tap out. It’s an agonizing submission when performed correctly, making it highly attractive for white and blue belts. It’s not surprising to see white belts being able to submit purple belts with this variation.
Hope that got you excited to learn it, because here are the steps to performing it properly:
- Start in Kesa-Gatame
- Grab the opponent’s elbow (the closer one)
- Do a crunch
- Place the opponent’s arm under your far leg
- Lock a triangle with your hands
- Bring the opponent’s head toward you
- Arch your legs to hyperextend his trapped arm
- Get the tap
If you want to learn more about the Americana, follow the link. Likewise, if you don’t know the difference between the Kimura and Americana, plus what makes each unique and effective, follow the 2nd link!
#2 – Head and Arm Choke
The 2nd submission we’ll review is the Head and Arm choke. This choke is, perhaps, one of the most unbearable and uncomfortable chokes you can apply on your opponent. It’s definitely up there, together with the Guillotine, Triangle, and Cross Collar Choke.
This submission is about trapping your opponent’s head and arm together and applying a lot of pressure. Many people think that you can’t use this submission against heavier and bigger grapplers than you. However, that’s untrue, as you won’t use your strength alone to apply pressure.
Instead, you’ll be applying force in a few directions, making it a much more agonizing choke. So don’t hesitate to start learning this choke. Here’s how to perform it correctly:
- Start in Kesa-Gatame
- Your opponent pushes your head
- Grab his triceps
- Move your head until it touches his head
- Trap his right arm with your head
- Your right hand’s palm faces down
- Lock a Gable Grip
- Kick your left leg forward
- Your left leg should be in line with his spine
- Lift his head with your hands
- Extend your arms
- Finish by squeezing and moving your hands around his head
- Get the tap
Also, here’s an incredible video about the Head and Arm Choke from the Kesa-Gatame position.
Learn more about the Head and Arm Choke, including 2 other variations, by following this link.
#3 – Armlock
The last submission we’ll review is the Armlock. Like the Americana and Head and Arm Choke, this is a classic submission you’re likely to learn in the first few weeks of your BJJ training.
Actually, the Armlock is a large group of submissions, such as the Armbar and the Straight Arm Lock. What makes them alike is the fact you’re targeting the opponent’s arm and overextending it, so the opponent is forced to tap out.
The Armlock from the Kesa-Gatame position isn’t difficult to understand. It’s, in my view, the easiest one out of the three. However, you might find it more difficult to get comfortable with, as it utilizes locking your legs in a Figure-Four, which might not be as intuitive for novice grapplers.
Anyways, you’ll be able to use it from the moment you get comfortable with it. Here are the steps to performing it properly:
- Start in Kesa-Gatame
- Wrap your right leg around the opponent’s right arm
- Lock a Figure-Four with your legs around his right arm
- Grab the opponent’s forearm
- Push his forearm up
- Lock an S-Grip
- Retract your hips back
- Push the opponent’s isolated arm down
- Get the tap
If you want to learn more about the Straight Arm Lock submission in BJJ, follow this link!
Kesa-Gatame Escape
You now know what the Kesa-Gatame is and attacks from it. So you can finish the opponent once you attain it; that’s fantastic. But what if you’re on the other side of the coin? You also want to know an escape route if you ever find yourself stuck in this position.
Here’s the best escape to the Kesa-Gatame position.
Getting your elbow out of the opponent’s grip is the first step to escape the Kesa-Gatame position. So the first step is to bridge up and release the opponent’s grip on your elbow. Then, you hook the opponent’s far leg with your leg, eventually taking the back and escaping the Kesa-Gatame.
You also want to get your head out of his lock, of course. So make sure to practice this escape, to ensure you never find yourself in a pickle.
Kesa-Gatame Tips
The next section of this article will go over a few tips you want to implement into your Kesa-Gatame execution. These will allow you to (1) retain it for longer, (2) finish from it more often, and (3) fuel your motivation tank!
So here are a few things you want to remember about this position:
Tip #1 – Gravity is your friend
From the title of this sub-heading, you know that gravity is your friend. But what does that mean? When you’re in top Kesa-Gatame position, you have the world working with you. Let’s say you weigh 160 pounds, or for my non-American readers, 72 kgs. That’s great, but what does that have to do with this position?
I’m glad you asked!
When you’re in Kesa-Gatame, you have 160 pounds working with you. The opponent has to work harder than you in order to do anything. Do you understand how advantageous it is? Let’s say you can’t finish the opponent.
Well, a viable option, especially in street fights, is to tire off your opponent. You do that by doing one thing, retaining this position. And by following all the things I’ve mentioned in the 2nd part of this article, you’ll be able to retain it for longer.
Tip #2 – Get your bottom off the ground!
You heard me. Get your bottom off the ground if you want to further limit the opponent’s movements. The odds of him bridging or rolling when you base yourself on your far leg (kickstand, as I previously have called it)—are slim.
So get your bottom off the ground and base yourself with the leg that’s not in line with the opponent’s spine.
Tip #3 – Learn more variations of the Scarf Hold
So this article was just about the standard Scard Hold position. However, there are other variations you want to know about, such as the Broken and Reverse Kesa-Gatame.
Learning them as well—will make you a more competent grappler, who has more options to attack and defend himself. The more you know, the more options you have. And the more options you have, the more likely you are to win, as you’re much more unexpected.
Who is more likely to be a better artist, the one with 2 colors in his pallet, or the one with 12? I love this metaphor when it comes to BJJ. It’s really the same deal.
This is a fantastic bridge to cover two other variations of the Kesa-Gatame position.
Kesa-Gatame Variations
This last part of the article is going to cover the fundamentals of two other variations of the Scarf Hold, which are the Reverse and Broken Scarf Hold. Let’s dive into the first one, as this article has gotten long enough!
Reverse Kesa-Gatame (Scarf Hold)
The Reverse Kesa-Gatame is the same as the standard version but with a single twist. You’re going to be facing the opponent’s feet, and not his head. So here’s what that would look like:
You want to trap the opponent’s right armpit with your right elbow to start attaining the Reverse Kesa-Gatame position. Then, you send your right leg toward his toes, so it’s in line with his left leg. Finally, you base yourself on your left leg to gain more control and stability.
Broken Kesa-Gatame (Scarf Hold)
The last section of this article (this one!) is going to review another variation of the Scarf Hold position. This one gives you more control and options to attack, so you definitely want to get familiar with it. Here’s what it looks like:
You want to underhook the opponent’s left arm with your left arm to start attaining the Broken Kesa-Gatame. Then, you grab his right elbow with your right hand while sending your right leg forward, so it’s in line with his spine. And lastly, you base yourself on your right leg, for more control and stability.
And this is it!
Final Words
So that’s it for the Kesa-Gatame in BJJ. It’s always a pleasure to research and write about new positions and moves I’ve always wanted to master. Writing about them has given me the ability to learn more about them, eventually mastering them quicker.
You want to start using the Scarf Hold position in your BJJ game. Although it doesn’t bring any points in a competition, it brings endless benefits, such as having gravity working with you together with endless attacking options.
So make sure to bookmark this article to return to it once you want to learn more about the Kesa-Gatame. Bookmarking this article is a step only the grapplers who take their training seriously will take. So if you’re one of them, you know what to do!
You can also sign up for our Email Newsletter to keep up with our blog posts and gain access to free martial arts/self-improvement courses!
And here are other articles you’d enjoy reading:
BJJ 101: Knee on Belly (Basics & Attacks)
9 Knee on Belly Submissions – Attacking Manual (BJJ)
Turtle Position: Complete BJJ Technical Breakdown
Attacking the Turtle Position in BJJ – 7 Submissions
BJJ 101: North-South Position – Basics & Attacks & Tips