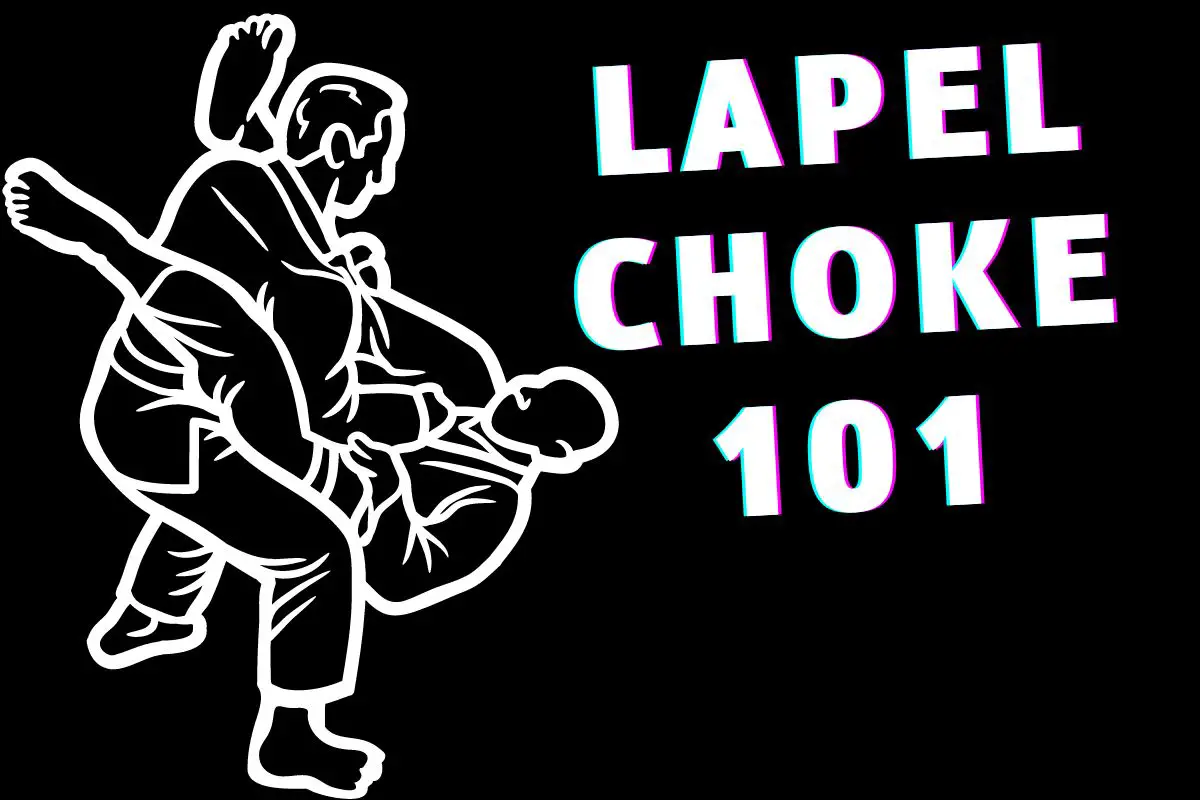
The Lapel Choke can be an extremely tight and effective submission. It’ll allow you to force an opponent to submit in just a few seconds. What makes it unique is the fact that you’re using your own Gi to apply extreme pressure levels, which is unheard of in BJJ.
However, you’re likely making specific beginner mistakes that prevent you from getting more tap-outs with it. We want to fix these mistakes and ensure you can finish BJJ fights more often.
I aim to make you see these mistakes clearly and give you solutions you can implement immediately to start finishing more with the Lapel Choke.
Likewise, we’ll review a lot of variations you want to practice; if you practice all of them (or at least learn and understand them), you’ll be a much better grappler! So, yes, your grappling game will improve just by reading this article; I’m confident in that statement.
Alright, enough introduction. Let’s break the Lapel Choke from the side control position and see how to submit more people with it.
How to perform the Lapel Choke
This part will break down the most common and effective (in my eyes) Lapel Choke variation. It’s going to be from the side control position. If you’re unfamiliar with it, I encourage you to follow step #1 carefully to learn how to effectively maintain your side control position.
You want to start in the side control position and pull your Gi out to perform the Lapel Choke. Next, slide your Gi through the opponent’s arm and grab it with your other arm. Then, you want to tighten your Gi while transitioning into the North-South position. Finally, you lean forward and apply more pressure.
Nonetheless, I’ll break each step down carefully and present you with the common mistakes most novice grapplers will make when going through it. Hopefully, it’ll allow you to build a solid basis moving forward.
That said, you want to read each step carefully and learn about these mistakes. Thus, you want to avoid going over steps and missing critical information. But, again, the more you can fix these mistakes, the more often you’ll get it successful.
Even a step such as: Start in the side control, holds more information than you think. And you want to read it carefully even if you’re confident in your side control skills.
So, let’s dive into step #1!
Step #1 – Start in the side control position
The first step is to start in the side control position. You can get to this position, for instance, by passing the opponent’s guard.
You can even start in the mount and dismount while maintaining as much control as possible. Then, you can transition into the side control position.
Being in side control will allow you to have maximum control over the opponent. You want to maintain control over the opponent’s hip, shoulder, arm, and head. Do that, and he won’t have any chance of escaping your dominant position.
Now that you control the opponent’s lower and upper body, you want to start this choke by advancing to step #2.
Step #2 – Create space and pull your Gi out
The next thing you want to do after gaining side control is to create space between the opponent and yourself while pulling your Gi out. If you’re unfamiliar with the Lapel Choke, it utilizes your own Gi to apply high-pressure levels.
Now, most people get something wrong with this step. They don’t apply enough pressure when pulling their Gis. And as a result, their opponents manage to escape their side control and start attacking.
You must apply more pressure on the opponent when creating space and pulling your Gi out. Most novice grapplers don’t do that; their opponents utilize their vulnerability and escape their side control. You want to avoid that to get this right more often.
Anyways, once you pull your Gi out, you can advance to the next step.
Step #3 – Slide your Gi through the opponent’s arm
The next step will be to slide your Lapel through the opponent’s arm. This is the cornerstone step you want to ensure you’re performing correctly.
You want to maintain as much pressure as possible to ensure you can tighten the choke later on.
Watch the video below to see a visual demonstration of this step.
Step #4 – Wrap your other arm around his head
Now, you want to wrap your other arm around the opponent’s head. Steps #3, 4, and 5 will all happen quickly. Thus, you can advance to this move once you pass your Lapel through the opponent’s arm.
By now, the opponent knows what you’re up to. He’s likely familiar with the Lapel Choke and knows you’re going for it, mainly because you just passed your Lapel through his arm.
That’s why you must maintain control while going for this step. You might even want to apply more pressure when wrapping your other arm around his head since it’ll be his best shot at escaping your dominant position.
Step #5 – Grab your Gi with your wrapped arm
This is the last step of the simultaneous moves (steps #3, 4, and 5.) Therefore, you want to ensure you’re executing these steps in the same motion.
Now, you want to grab your Gi (the Lapel you passed through in step #3) with the arm you wrapped (step #4.) Next, you can probably start to imagine how this choke will play out and how you can submit the opponent.
This wrap will be what applies pressure on the opponent’s neck. You won’t be able to perform this choke without wrapping your Gi around his neck; this is what this submission does.
Step #6 – Tighten the pressure (tighten your Gi)
Alright; this step will be the first step you do to tighten the choke. That’ll ensure the opponent has no option but to surrender, as you’ll be applying enormous pressure levels on his neck. It’s hard to continue fighting this way.
So, how do you tighten the pressure in your current position? First, you want to pull the Gi closer to his neck. But, of course, if you go about it the wrong way, the opponent can escape. So, you want to apply more pressure when doing so (especially with your body weight.)
Watch the following video to see a visual demonstration of how to tighten your Gi properly.
Step #7 – Control his hips
Now, this step is critical. By the way, we’re almost done with this breakdown; hopefully, you’ve understood how to perform this choke so far (I’m sure you have! You’re probably an eager trainee if you’re reading this article.)
Controlling the opponent’s hips in BJJ (in grappling, in general) is essential. Spoiler alert, you’ll transition to the North-South position in the next step. So, what do you think the opponent’s reaction will be when you do that?
Naturally, he’ll want to follow your movement and get you in his closed guard position. However, everything you’ve done so far will disappear if you do that. So instead, what you want to do is block his hips.
You can do that by placing your hand on his hip and start turning. But, first, let’s see what it looks like.
Step #8 – Transition to the North-South position
You must control the opponent’s hips if you want to perform this step correctly. This is what applies most of the pressure in this choke. As a result, you want to get it right.
The North-South position is essential to know and understand. You want to get comfortable with it, regardless of whether you’re practicing this submission. You can go for many submissions from this position, as it gives you much control.
Eventually, you want to twist, and you’ll see how much more pressure your Lapel (Gi) can generate on the opponent’s neck.
Experiment with this step to start seeing how this choke plays out. Don’t just read this article; instead, go and practice right after you’re finished!
Step #9 – Lean forward and pull your Gi back
The last step is to lean forward and pull your Gi back from the North-South position you turned to. This will allow you to more than multiply the pressure levels on your opponent’s neck.
This step is a must, although many novice grapplers mistake and skip it. You want to ensure you’re performing it correctly.
So, lean forward and pull your Gi back from the North-South position. You want to use your Lapel and hand in contrary directions. That will help you finish more fights with this submission.
Really, have someone do this variation on you to see how much pressure you can generate with it.
Step #10 – Wait for the tap
So, you’ve already done everything. You’re now a proud owner of the Lapel Choke from side control. However, there’s a responsibility that follows this knowledge.
Primarily, you want to ensure you’re not hurting somebody in the process of training or fighting. So you’ll be practicing it now and starting to build muscle memory.
One of the best habits you can develop is watching and focusing on your opponent after applying pressure. Not only will it help you win more fights, but it’ll also force you to pay extra attention to the opponent.
Don’t let your power hurt somebody else in the process. Be sure you’re paying attention to the opponent when applying a lot of pressure. You can seriously hurt someone if you’re overdoing it.
Lapel Choke Variations
Now you know how to flawlessly perform the Lapel Choke from the side control position. What you want to do now is learn more variations to broaden your toolbox.
I’m a fan of learning as much as you can about the technique you want to master, especially if your goal is to become a competent grappler.
That’s why the second part of my BJJ technique breakdowns are always variations you want to know about before starting to master the specific submission or position.
As a result, I encourage you to go through each of the 4-variations I review in the next part.
Let’s dive into the second part of this article: variations!
Variation #1 – Lapel Choke from Side Control
This variation is a highly effective one. However, it also is pretty unique and creative, as you’re using your own Gi to apply higher pressure levels on the opponent.
Many advanced grapplers use this choke in competitions; therefore, it’ll be best if you learn it, too, especially if you want to become a better grappler.
- Start in the side control position
- Start with your hand behind the opponent’s head
- Create some space and pull your Gi out
- Slide your Gi below his hand
- Wrap your hand around the opponent’s hand and grab your Gi
- Pull your Gi back (elbow)
- Go to the North-South position
- Lean forward and straighten your arm
- Wait for the tap
Make sure to lean as much as you can in the end, to ensure the choke you’re applying is tight enough so the opponent will tap out!
Something many BJJ trainees get wrong with this Lapel Choke from the side control position is that they don’t apply more pressure when they pull their Gi out. As a result, when you pull your Gi out, your opponent will start to suspect you’re going for the Lapel Choke. As such, always apply more pressure when you do so, so he will have a difficult time escaping your side control.
Variation #2 – Lapel Choke from the Turtle Position
This variation is one of the more difficult ones you’ll stumble upon, and it is tough to learn. So, don’t get discouraged if you’re not at that level yet. Rather, try to learn and practice it to see if you can perform it.
Once you get the hang of it, you’ll start to master this beautiful variation. After all, it’ll allow you to get an extremely tight choke on the opponent and force him to tap out in just a few seconds.
Here’s how you perform it:
- Start in the turtle position
- Pull your Gi out and grab it
- Wrap it around the opponent’s neck
- Wrap your leg around his head
- Sit by leaning backward and maintaining control
- Place your other leg on his back
- Lean backward (with all your weight)
- Wait for the tap
I encourage you to try this variation out. It’ll definitely get your brain moving by forcing you to think. The turtle position in BJJ is an effective defensive position. You can pass through it, however, using this choke. So, try it out for yourself.
Who knows? You might like it!
Variation #3 – Lapel Choke from Side Control (Mount Finish)
This next variation is the same as the one we’ve broken down in this article (the 1st variation.) However, it utilizes a slightly different finish.
So, when should you use this variation? You want to use it when the opponent turns to his side when you go to the North-South position. How do you counter that defensive move he pulled out? Let’s see.
- Start in the side control position
- Create space and pull your Gi out
- Grab your Gi and slide it through the opponent’s arm
- Pull it with the other hand, making it tighter
- Go to the North-South position
- Once the opponent turns on his side, go to the mount position
- Wait for the tap
Indeed, you’ll be applying so much more pressure if you go to the mount position in the end. You want to ensure you do that if your opponent turns, as you want to make a complete rotation. That will ensure the opponent has no chance but to tap out.
Variation #4 – Mounted Lapel Choke
I was surprised to find such a simple Lapel Choke variation and learn it rather quickly. Honestly, I haven’t learned the Mounted Lapel, so it’s interesting to see how quickly you can learn a submission, especially if the teacher is informative and experienced.
I recommend learning this variation, as it utilizes your top position to make the choke easier and finish quicker. Additionally, the opponent will have difficulty escaping it if you emphasize maintaining proper control throughout this variation.
Here’s how to perform it:
- Start in the mount position
- Block the opponent’s head
- Take your Gi out
- Switch your arms while maintaining Gi control
- Dismount and go to side control
- Block the opponent’s hips
- Go to the North-South position
- Straighten your arm while leaning forward
- Wait for the tap
How do you defend the Lapel Choke?
The best way to defend the Lapel Choke is to focus on preventing the opponent from wrapping his hand behind your head and grabbing his Gi. You want to use the time when he creates space to pull his GI to escape. Many advanced grapplers will know you’re about to do that and apply more pressure on your body.
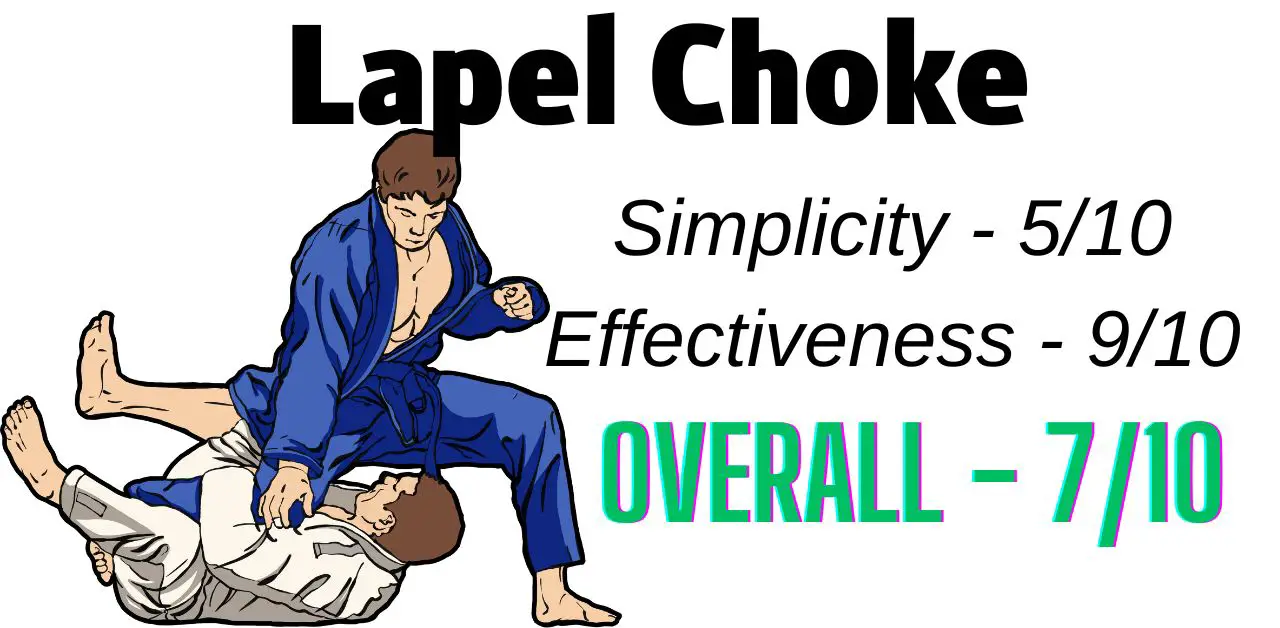
Is the Lapel Choke effective?
The Lapel Choke is a highly effective submission. It utilizes your Gi (Lapel) to cause a lot of pressure on the opponent’s neck. The most practical positions you can do it from are the side control and mount. In addition, the Lapel Choke isn’t as complicated to execute, making it more attractive to novice grapplers.
Should I learn the Lapel Choke?
It would be best to learn the Lapel Choke, as it’s highly effective and simple to learn and execute. You want to perform it from the mount and side control positions. It utilizes pressure on the opponent’s neck to force him to submit. You can force your opponent to tap out after just a few seconds of applying this choke.
When should I use the Lapel Choke?
It would be best to use the Lapel choke when you’re in the mount or side control positions. However, you must use it when wearing a Gi, as it applies neck pressure to your Gi’s collar. Therefore, if you’re doing No-Gi BJJ, you can’t perform it.
Final words
Alright, that’s it. You now know plenty about the Lapel Choke in BJJ. It’s genuinely one of BJJ’s most effective submissions. You can learn it whenever you want, even when you’re starting out.
The primary position you’ll perform it from is side control. That said, you can do it from the mount as well. Therefore, you want to work on these positions to ensure you know how to use them properly.
Now, I want you to act. I know it can be challenging to start practicing a technique from scratch. However, it’s the best thing you can do now; practice and experience beat learning and reading.
And, you’d also enjoy reading about how to finish from the side control position (best submissions) if you enjoyed reading this article.
Here are some articles you might want to read next: